How to install Android KitKat in VMware Workstation
Recently I stumbled on an article which briefly explains the installation of Android KitKat 4.4 inVMware Workstation. I knew that previous version of Android worked fine (including network) inVMware Workstation – see this post, but some tweaks were necessary. I wanted to test the latest version of Android, to see how it looks like and if it’s true that VMware Workstation can be used for the job. And it seems that the tweak for the network card, when the change in the VMX file was necessary is no longer needed. I’ll walk you through the steps to install Android KitKat inVMware Workstation.
How to install Android KitKat in VMware Workstation? The steps:
1. Download the iso file from this page – the file is called android-x86-4.4-RC1.iso
2. Then create a new VM via the Wizard and connect the ISO (Workstation detects the new VM as FreeBSD).

3. Adjust the hardware of the VM and adjust the Memory. I put mine to 2Gb of RAM as most of today’s phones uses 2 gigs of RAM. Click next and use the arrows to go down to select the 4th option – Install Android Kitkat.

4. Select Create or modify partitions

5. Then create a new, primary partition and write down the changes.
6. Then select this partition to install Android KitKat.

7. Chose EXT3 as filesystem …..

8. Almost done, just validate the formatting of the media.

10. Validate the Read/Write possibility, otherwise you won’t be able to make any changes to this VM.

I’m not sure it’s here but during one moment it also asks you if you want to install GRUB as a boot loader. Says YES as without validating you won’t be able to boot up the system.

11. Let the installation rolling….

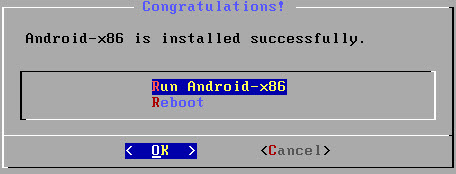
13. Then you’ll see a screen which shows you if you to run Android or reboot. You can go either way, but don’t forget to disconnect the ISO file before the next reboot otherwise you’ll start over and you’ll be presented with the LiveCD option again!

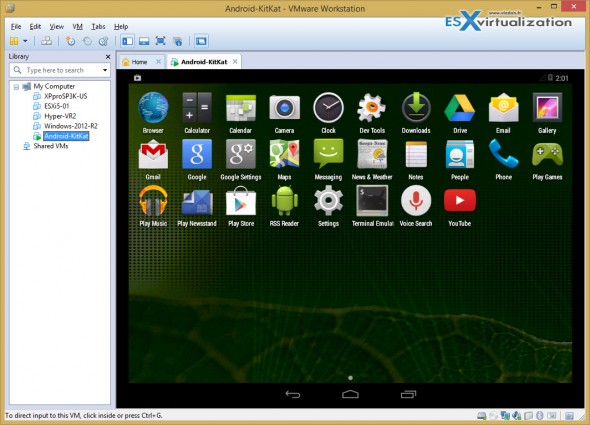
Ok, now you should see the VM booting into a configuration of Android, where you can personalize the system. As being said at the beginning, there is no necessary to tweak any other options, nor the VMX file for network access. The network works out of the box (I kept NAT as an option).


0 comments:
Post a Comment